Showing posts with label sweet stuff. Show all posts

Tuesday, May 28, 2013

Crafting meets Cooking

This weekend was my birthday! I got dressed up, got some books, ate some great food, and got lots and
lots of tea! (lots of tea). I love tea, I love drinking it, serving it, making pastries to go with it, and when it comes to English tea I have it pretty much down. This year however I'm looking to play out more with green teas.

They still work well with my usual tea service, but felt like it would also be fun to try bringing in some new tea traditions to the party. On the way are some first pieces toward a small Japanese tea set (and people thought I had run out of tea-wear to collect!),  and today I started taking a few baby steps into the world of wagashi, traditional Japanese sweets, often made specifically to go with green tea. Something a little different from my usual cream tea with  killer scones and home made clotted cream every now and then.

A while back we were lucky enough to try a few different kinds of wagashi from a wonderful shop in LA, and some others from Minamoto Kitchoan in Mitsuwa to get a taste for them. While I' await a big old book on the subject to drop on my doorstep, this weekend I took to the internet for some recipes and got my hands sticky trying to make a type of wagashi called nerikiri.

 The first step was to make a batch of sweet white bean paste, the second, to keep half the bean paste for fillings, the other to create the neriki, a kind of marzipan texture dough which shapes and colors like a dream. The result just like my first scones was a little spotty, but life is all about practice!

The whole process took somewhere over 3 hours, so it's not something to whip up the day you plan to serve them, but the bean paste and dough are freezable, so possible to keep on hand for faster making when the mood hits.

Typically served with matcha ( powdered green tea), the sweetness of the cakes is to play well with the bitterness of the tea, so if you go towards the top end of the sweetness scale from the online recipe, it's dialed right up to one hundred. In the future for full leaf green teas like I usually drink, I think I'll dial the sugar back a little.

The big thing with wagashi is they are supposed to be a treat for all the senses. Silky textures, good flavor, and candy for the eyes. Shaped to match the seasons, wagashi specialist's sweets look like perfect works of art! Mine, so far, maybe not so much. Had a go at hand shaping some like the pinks currently gowning in my front garden, and experimented using a petit four mold in place of the traditional wooden kashigata to see how that went (not brilliantly).

Certainly looking forward to learning and trying more when my book comes. It would be smashing to bring a bit of the surroundings to the tea plate this summer drinking tea outdoors. Next up "jelly" type wagashi. The retro hostess in me can't resist a pretty treat that wobbles!

Tuesday, January 8, 2013

Tropical Fancy

After being faced with jello shots I couldn't enjoy once again at a party over new years I've been back on my vintage housewife jello kick again. This time playing out with making a layered dessert using DIY flavored jelly. The flavor was inspired by sticky rice and mango, and destined to be kicked up a notch with the addition of a coconut rice pudding layer in a future variation. This one how ever takes no time at all and is easier than pie!

Tropical Gelatin Fancy

Ingredients:
Top Layer:
  • 1/2 cup mango syrup
  • 2/34 cup chopped mango pieces
  • 1/2cup Water 
  • 1 Envelope Knox plain gelatin 
Bottom Layer:
  • 1/2 cup coconut milk
  • 1/2 cup water
  • 2 tbs sweetened condensed Milk
  • 1 Envelope Knox plain gelatin 
Method:
  1. Make the bottom creamy layer 1st
  2. Sprinkle gelatin over 4tbs water in a small sauce pan and leave for about 5min
  3. Heat water in larger saucepan to make a water bath, float the smaller pan of gelatin in the water bath and heat gently till gelatin is fully dissolved. Shake occasionally but do not stir to avoid bubbles.
  4. Once gelatin is dissolved mix in your coconut milk and condensed milk along with 1/2 a cup of water and stir gently to combine.
  5. Pour mixture into a bowl or mold.
  6. Leave to set for approx 30min till set but not firm.
  7. Repeat steps 2-4, this time mixing in the mango syrup and water with the gelatin, 
  8. Add in the chopped mango to this mixture
  9. pour over top of your earlier layer and leave to set for 3 hours
If you're going the easy dessert route then pretty bows like these make a great serving and setting vessel, If you want to be fancier however set it in something flatter so you can turn the set jello out and cut into shapes with a cookie cutter for booze free tiki party jello shots or  tea party treat!

Friday, April 20, 2012

Azalea Cake

I'm going to start this post with saying that every mid century loving host/ess needs to pick up the Cooks County anthologies! Evey issue they have a featured cake in the back, always seasonal, always bright, and nearly always an old mid-century favorite. An that is where this years husbands birthday cake came from!

Back in the 50's/60's "flower" cakes became increasingly popular. They had fun names like daffodil cake and were decorated and colored to match. This week I put together an azalea cake. On the surface, maybe an overly pink choice for a fella's birthday, but it had all the components (fruit, non sickening frosting) we love in our house, and I wasn't quite creative enough to think of another azalea color that would also taste good and not look off putting.


The recipe was a fair amount of work, and took close to 2 hours due to only having the 2 cake tins (needs 3) but so worth the effort! It's basically a white layer cake made with red food coloring in the center layer, frosted and filled with 7 minute icing and layered with fresh strawberries, raspberries and nuts. I obviously used the Cooks Country recipe, (minus the kirsch) but you can use your favorites if you don't have that one. Next time I make it the one change I'll make is as well as the chopped up the fruit mixed with the filling frosting, I'll layer extra thin cut strawberries along each layer of cake as well to give the cake a more fruity, fresh, tart flavor. That said, next party you throw, the pink azalea cake would make a swell retro center piece!

(My other favorite mid century dessert is of course the stained glass cake, I make a ton of these every Summer!)

Wednesday, January 25, 2012

Hagleslag

Another discovery from our stop in the Hague was a silghtly perplexing but utterly thrilling breakfast tradition, Hagleslag!

What it basically is, is chocolate sprinkles you eat with bread and butter. The little boxes above the bread board at the hotel was the first thing I went for, and as odd as it seemed to my outsider eyes, it really is a wonderful snack/breakfast treat!

The Sprinkles (or curls if you feel fancy) are much different the the waxy ones we see here in the States on top of ice cream. They are extra chocolaty and genuinely tasty!

It is fairly easy to pick up some of the hagelslag here in the States from either World Market or Amazon. Once you have them all you need a a nice slice of good bread (preferably brown) a bit of butter spread across it to hold the sprinkles in place, then pour on as many as you fancy and enjoy!

We got a nice selection from a grocery store by the hotel you wouldn't believe the selection available over there! I hope you'll give it a shot as well, you'll feel terribly continental and like a happy kid all at the same time!

Monday, June 20, 2011

Quaintrelle Jello Shots (no booze)

Building on the success of the last "Jello" experiment, I finally went and made my "Quaintrelle jello shots" over the weekend. The flavor? Milk tea of course! To cement the "shot" aspect this time around I made them as individual tiny servings set up in little vintage demitasse!

So if you have a few tiny cups you've been wondering what to do with, this recipe is for you!!

Mini Set Teas (makes about 5 mini teas or 2 regular sized ones)

Ingredients:

1 cup boiling water
3 Black tea bags
3Tbs Sweetened condensed milk
1 Envelope Knox Gelatin


Method:

  • Brew your 3 tea bags for approx 5 min (or to flavor) in 1 cup of boiling water (ideally in a glass measuring jug or easy pourable vessel) .
  • Mix in the 3Tbs of condensed milk into the brewed tea.
  • Sprinkle gelatin over 4tbs water in a small sauce pan and leave for about 5min
  • Heat water in larger saucepan to make a water bath, float the smaller pan of gelatin in the water bath and heat gently till gelatin is fully dissolved. Shake occasionally but do not stir to avoid bubbles.
  • Once gelatin is dissolved add to you milky tea mixture and stir gently to combine.
  • Pour mixture into each demitasse
  • Chill for 3 hours to set.
These make a wonderful little amuse-bouche  for a more satisfying dessert I recommend setting the Jello in a large teacup with a wide bowl and topping with a rich vanilla Ice-cream or frozen custard. These first "shots" were made with good old regular black tea, but other wonderful flavors included rooibos, earl grey and chai.

I hope you'll give it a shot at your next tea party!

Wednesday, June 15, 2011

Quaintrelle Jelly and Ice Cream

The road to reworking great retro desserts starts with a single step! As much as I L.O.V.E Love Jello, I was looking for greater variety and flavor in my wobbly desserts. Today I did a brief experiment to see if I could use some of the syrups from my soda bar to create some original flavor gelatin desserts...


Originally I was going to try some flashy little bite sized treats, but it looked so good in my new Fishs Eddy bowl that I decided getting it to set was a feat in itself, and I went with the English childhood classic, Jelly & Ice Cream! (that's Jello and ice cream to my American chums). Every one here thinks it's weird but I swear it's great!


Lychee and Elderflower Jelly and Ice Cream


Ingredients:
  • 1/4 cup Lychee syrup
  • 1/4 cup Elderflower syrup
  • 1/2cup Water
  • 1 Envelope Knox plain gelatin
Method:
  • Sprinkle gelatin over 4tbs water in a small sauce pan and leave for about 5min
  • Heat water in larger saucepan to make a water bath, float the smaller pan of gelatin in the water bath and heat gently till gelatin is fully dissolved. Shake occasionally but do not stir to avoid bubbles.
  • Once gelatin is dissolved mix in your syrups along with 1/2 a cup of water and stir gently to combine.
  • Pour mixture into a bowl or mold.
  • Serve along with a scoop of your favorite ice-cream (or in this case frozen custard )
  • Feel like a fancy kid.
I'm still refining everything but this should hopefully be tasty step in the right direction to a few real corkers of desserts!

Sunday, April 17, 2011

Lazy Scones

So do you ever site there thinking "Man I could go for a spot of afternoon tea right now, if only scones didn't take so long make." All the time right? Me too! Well as a lazy lady who loves cream tea I got to thinking the other day, what about Bisquick? The English scone more closely resembles what my American chums call biscuits than scones more often than not, so logic followed that if I were to mix up a batch of Bisquick, throw in some raisins I should have a passable scone!

Now I can see my hopes for a knighthood sliping away as I type, and Bettie's tearoom isn't going to go out of business anytime soon, but my Bisquick scones were pretty darn good for throwing something from a box into a bowl with some milk!

To make Follow the biscuit/dumpling recipe...

  1. 2 1/4 cups Bisquick
  2. 2/3 cups Milk
  3. 1/2 cup raisins
  4. 1/4 cup sugar (optional)
  • Mix Bisquick, raisins and milk in a large bowl till combined (and 1/4 cup sugar if you like em sweeter)
  • Kneed dough about 10 times on a Bisquick dusted surface
  • Roll out to about 1/2" thick
  • Cut into 2"-3" rounds (or something prettier)
  • Brush a little milk over the top and sprinkle with sugar (optional)
  • Bake for 8-10 mins at 450F or till golden brown
Let them cool down a bit, cut them in half, add a generous helping of clotted cream and jam, eat them with a pot of your favorite tea and voila cream tea in minutes! For those looking for a good English scone recipe, this old Be-Ro recipe has been the one we used to make growing up.

Sunday, February 20, 2011

Passion Fruit Creams

Been experimenting trying to make candies with monin syrups! Today we made some passion fruit creams and they came out pretty neat!

Sadly I made a full 2 trays of them with dark chocolate before finding out that it really overpowered the filling :( had just enough fondant left to make 6 milk chocolate versions, much better! I was worried the Monin syrups wouldn't be strong enough, but these came out zesty and very passion fruity!

Want to make you own? Ok here's how!

Ingredients:
  • 3Tbsp Passion Fruit Syrup
  • 3Tbsp Heavy Cream
  • Yellow food Coloring
  • 2 Cups packed down, confectioners sugar (10oz)
  • Enough milk or white chocolate for melting and filling your mold
  • Candy Mold
Method:
  1. Mix Cream, syrup and 2 drops of food coloring into a bowl
  2. Sift the confectioners sugar to remove lumps, and slowly mix into the cream and syrup mixture till it forms a soft paste.
  3. Next melt your chocolate (double boiler or chocolate melter, never over direct heat!), once it's nice and melted paint the mold with a layer of chocolate, and put in the fridge to set up.
  4. Now transfer your cream filling to a pastry bag with a 1/2" nozzle and pipe the filling into your chocolate shells still in the mold.
  5. Fill the rest of the molds with the melted chocolate and tap a few times on the counter top to level the chocolate and remove air bubbles.
  6. Put your molds back in the fridge to fully set up. Turn them out and wow your friends!
 For a super English treat hit the violet or  rose syrups to make your creams, the sky is really the limit! the best thing is the syrup also makes an outstanding soda! just a shot (30ml) of the syrup in a 10oz glass, fill it up with some club soda and you have a smashing Italian soda ready to go!
Monday, February 14, 2011

Time for Elevenses?

So we're both back from our England trip, half way through unpacking and getting back to the business  of being back at home. It's always tough coming back, I miss my family and I miss a lot about jolly old England. Still, give me till lunch time and I'll be in the American swing of things again. (but not before then, because I'll be having elevenses!)

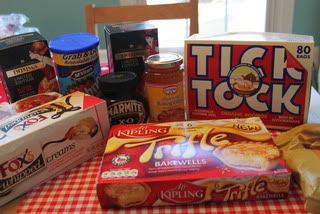
When I was a kid I first experienced the joy of "Elevenses" at brownie camp. It's basically a cup of tea and light snack such as a cupcake or some biscuits (British for cookies), eaten around 11am, like a morning afternoon tea! Mostly because the name is kinda funny, and because it's an excuse for cake after breakfast, we've been deeply into elevenses lately at chez Hoffpauir. After beginning to unpack from the trip it looks like we brought back quite the haul of snacks and tea perfect for the "meal"!

Fox's biscuits, Hob Nobs and a new trifle spin on the Bakewell tart (not to mention a few hard to find baking bits and bobs)! The current star for me though is finding a tea company I'd missed before, Tick Tock rooibos tea. I loved the packaging so much I brought back a big box for the house! It's definitely one of the tastiest rooibos teas I've had too, so tastes as good as it looks. I love the ad they made with various Tick Tock drinkers too (watch for the awesome 1940's lady).


To cater to the harder to find items I miss from the homeland we also picked up a couple of candy making books. Between the 2 there are recipes for some of my favorite sweeties like rose and violet creams, various toffees and rhubarb and custards. Can not wait to try some of these out! I especially love the presentation of the little Life is Sweet book. it's full of quirky personality and some of the cutest retro illustrations!

So there we have it, all our sweet stuffs are unpacked, clothes are in the wash, we're getting back to work and if you can't get hold of me around 11am, I'm probably enjoying some of the above and planning what to have with afternoon tea!

Friday, February 4, 2011

Tasty Teatime Treats

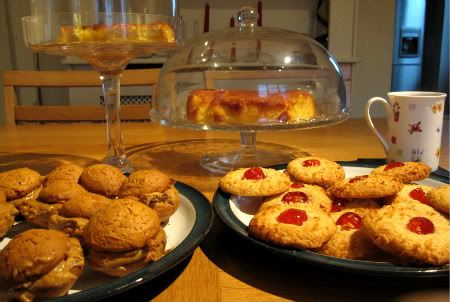
Had a great time baking with my mum! We made a cake from a new recipe she had picked up recently, and 2 of my favorite treats from when I was a little girl, Coffee Kisses and Melting Moments! They are both cookies of sorts, one filled with coffee flavored butter cream, the other covered in coconut with glacé cherries tucked into the top.

The Be-Ro recipes are all online these days. You can check out the links above and give them a shot!

The ingredients are all US friendly, the only thing you might need if you wanted to try them yourself would be a weighing scale. Caster sugar is just regular granulated sugar, and we always use vegetable shortening instead of lard, but you might be more traditionalist with that than me!

Wednesday, October 27, 2010

Syrup Bonanza!

A big order of syrups arrived today for our soda making adventures here at Quaintrelle HQ! 6 full size and 24 tiny samples to play with. Rose and Violet are already 2 of my all time favorite flavors (I can never decide which one of the 2 is my all time favorite), the rest I'm just excited to try. Almond sounds like it should be a good mix for some interesting flavors maybe?

We're still moving on with our home re-model project, as soon as it's all done it'll be time for a fancy mocktail and soda party in our shiny new home!

Tuesday, August 17, 2010

Macarons at Home!

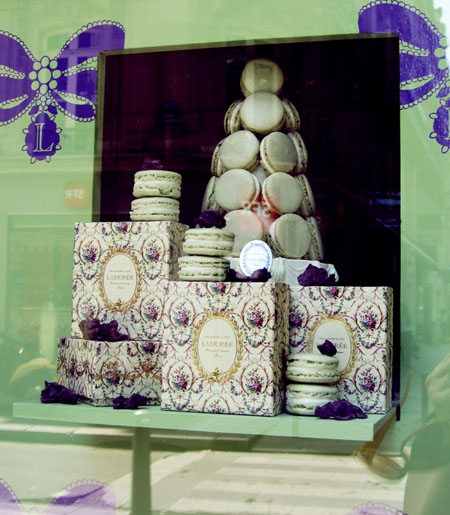
I fell in love with macarons years ago, first Laduree graced my screen in the Marie Antoinette movie, then they peaked out from various skirts and dresses, and finally after a trip to Paris the love affair was sealed! I love them because of their diminutive size, rainbow colors, and the fact they so often show up tasting like flowers!

Whilst my love was strong, getting a fix was hard. So many shops sold rather dry under filled macarons that leave you wondering what the fuss is about, or they rocked but had to be special ordered, an my home efforts were rather pitiful . That is until I was presented with enrollment in to a macaron class for my birthday!! I had to wait for months for the day to come but after it did the macaron method mystery was finally revealed!

The class took a good 3 hours, but we all came home with some great little pastries, and this last week I finally had a try on my own with success!

It seems the biggest thing was to follow the rule of "let them sit before you bake" the 15 minute wait gave them a bit of a skin on top, and that let them rise soft and puffy into the sky, and they came out pretty and tasty!

I had a try coming up with my own flavors and have to admit my favorite home macaron was my favorite Laduree flavor, rose.

for mine I made a classic French butter cream filling with a splash of rose essence. I spread a generous layer of the butter cream onto the bottom cookie, followed by a dab of rose petal jam on top of the cream before sandwiching and leaving to set up in the fridge.

If you are a fan of flower flavors it's well worth a try, rose flavor can be hard to find, but I have been able to source a rose jam here in the states as well as rose extract, you can also use rose water instead of essence, and top with a dab of raspberry jam which are pretty easy to find in the local grocery stores these days(rose and raspberry go great together!)

Some Quaintrelle macaron Tips!
1: Wait: Definitely leave the whites out at room temp for the 3 days recomended, and let the macarons rest for the full 15 mins before baking them, and wait till the next day to eat them. I could never cope with all that waiting before but it really pays off!
2: Extra bang: To get multiple flavors from one batch, make a classic french butter cream to fill them, separate it into as many containers as you want flavors and flavor and dye each batch separately.
3: Remember art school: If doing say 3 flavors, pipe the first set plain white, the second add a little pink dye before adding to the piping bag, the second a little blue or yellow to make lilac or orange colors. You'll be able to get so many combos from one batch and really make a splash when you serve so many varieties for the same work as one!

I already have my next batch of egg whites sitting out on the table ready to go with batch number 2.

Tuesday, July 6, 2010

Pretty as Pie


More Cooks Country adventures, this time Stained Glass cake! I opened up the Cook's Country 2009 Annual, and there was this bright cake shining back out at me, and it was so colorful I had to make it!!

Apparently this cake was used in Jello ads back in the 1950's and was something of a retro favorite. I love a good bit of Americana and when it's tasty as well as fun and kitschy it has to happen!

I took one to our friends house for 4th of July and it was a big hit. Right now I'm trying to come up with a recipe for an elegant miniature rose flavored version for tea parties?

Here are a couple of vintage broken glass cake pictures from the late 50's...

Tuesday, June 29, 2010

Cat Head Biscuit?

A few years back we were eating in a gas station/diner/place that sells kitschy fairies and knives, and the menu featured a "Cat's Head Biscuit" which was explained to us as "a biscuit the size of a cat's head" they were pretty good!

The other week we got our copy of Cook's Country and lo and behold a recipe for cat's head biscuits!

Sunday morning my husband and myself baked up a batch and they are super delicious. The size of our cat's head, and light and fluffy.

It seems the secret to getting your biscuits cat head size was to scoop the dough into the pan with a 1/2 cup measuring cup. You can probably try this super scoop with your regular biscuit recipe. but I can heartily recommend the Cook's Country one for a great biscuit. I'm thinking I might try some with raisins for a kind scone like concoction (proper English scones are more like what our American friends call biscuits than scones a lot of the time), or sprinkle some with sugar for strawberry shortcake. Either way I'm baking up cat head size from now on!

Saturday, May 29, 2010

Macaron-i

It was my birthday this week, and over all it was a tasty one! Last year I was in Paris for my birthday eating macarons from Laduree, this year I was at home and the macrons came to me!

I got a big box from Michel Patisserie with 2 or 3 of each flavor they make!

I have to admit I fell in love with these pastries a few years back and am kinda happy that they are getting so much attention over here these days too. I know some people feel kinda iffy about the "mainstreaming of the macaron" with the fear that thousands of poor quality sad macarons will some how spoil the magic. To me however although a frozen Trader Joes macaron won't quite live up to the decadent treat of a hand crafted box of pretty little sweets in exotic flavors, it can chase away the blues on a night at home when you just want a macaron fix.

For any one who hasn't had a rocking good french style macaron Michel Patisserie ship all over the country, you can order through their website.

I love them because they taste great, look beautiful and make my day feel a little more special.

Right now I'm still working towards getting the kitchen finished, but I have a macaron class to go to early August, so I hope I'll be able to make some crazy flavored almond treats from my friends and family (and me!) once everything is finished for the "house warming" party!
 

Based on layout and code by Lena